
If you want the smoothest possible experience with the TrimUI Smart Pro S portable gaming console, the best approach is to start with a clean microSD card, install the latest official firmware, copy the newest SD base package, apply the latest hotfix, and only then add your ROMs and BIOS files.
That setup flow is not just cleaner. It also helps prevent the most common problems new users run into, including:
- games not appearing in the menu,
- save failures,
- RetroArch exit crashes,
- incomplete ROM folder setups,
- and confusion around firmware files versus SD package files.
Compared with a more compact handheld like the TrimUI Brick portable retro handheld, the Smart Pro S gives you a bigger screen, more battery, and a broader Linux handheld experience. But that also means the initial setup matters more if you want the device to feel stable and polished from day one.
This guide walks through the process step by step, using the same setup logic shown in the screenshots you provided: checking the SD card in Windows, formatting it correctly, downloading official firmware and SD assets, extracting the packages, copying files to the correct folders, and fixing common save or menu problems.
What You Need Before You Start
Before you begin, prepare the following:
| Item | Why you need it | Recommended |
|---|---|---|
| TrimUI Smart Pro S | The device being updated | SD version or no-card version |
| A quality microSD card | For ROMs, BIOS, and SD package files | 128GB or 256GB from a trusted brand |
| A Windows PC | For formatting and file transfer | Windows 10 or 11 |
| 7-Zip | To extract .7z firmware and SD package archives | Official 7-Zip site |
| Rufus | To format large SD cards as FAT32 | Official Rufus site |
| Official TrimUI firmware files | For base firmware update | Latest GitHub release |
| Official TrimUI SD base package and hotfix | For ROM, RetroArch, and stability fixes | Latest GitHub assets release |
The safest workflow is:
- update firmware
- rebuild the SD card cleanly
- apply the latest SD base package
- apply the latest hotfix
- copy ROMs and BIOS files
- test saves and game exits
That order reduces troubleshooting later.
Step 1: Download the Official Files First
The cleanest setup process uses three official file groups:
| File group | Purpose |
|---|---|
| Firmware package | Updates the device-side system |
| SD base package | Builds the card-side folder structure and core assets |
| Hotfix package | Replaces older files with the latest fixes |
Download the latest releases first so you only build the SD card once.
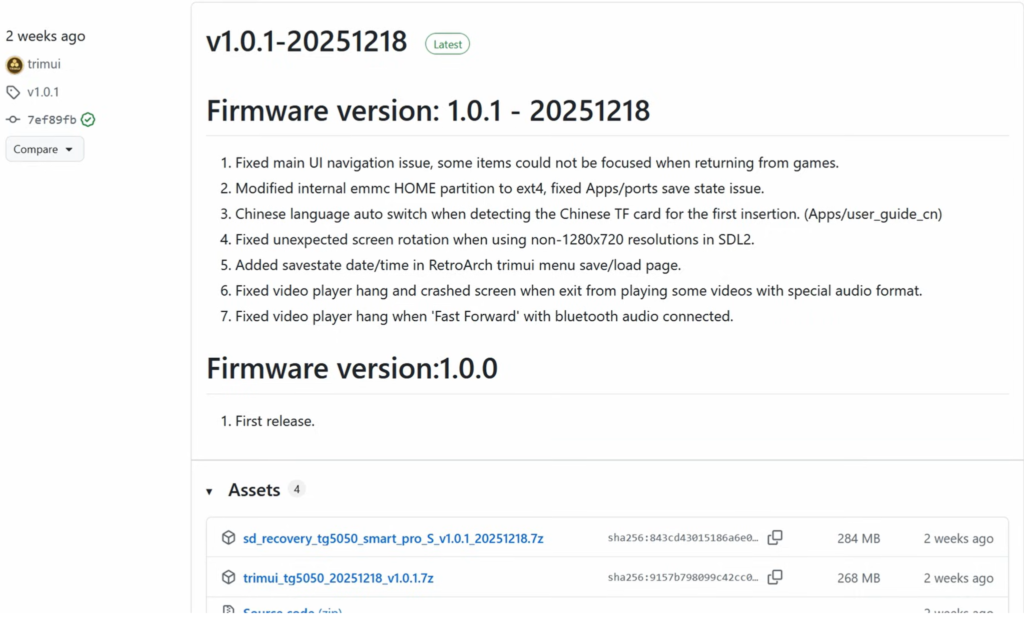
Caption: The official firmware release page shows the current Smart Pro S firmware version and release notes.
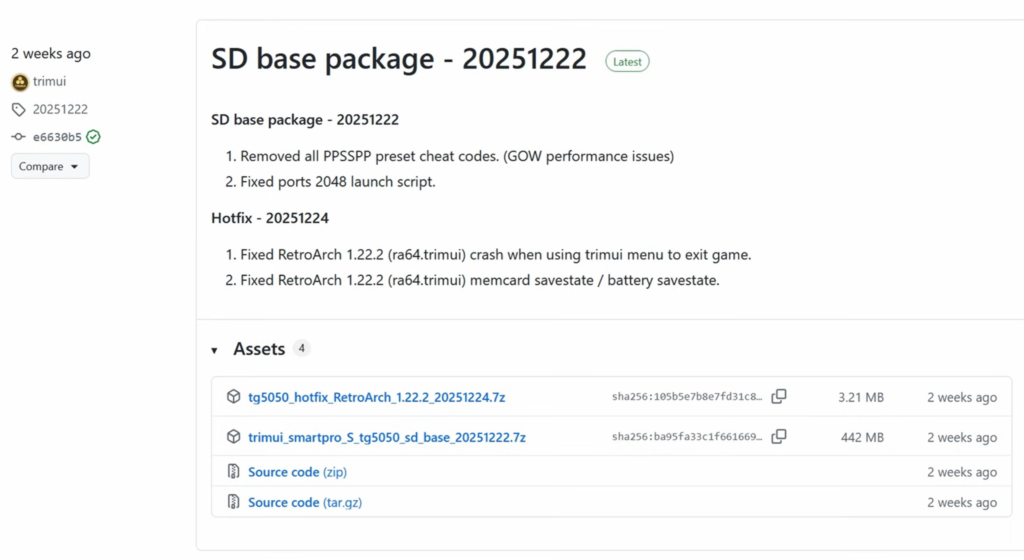
Caption: The official SD base package release includes the SD package and the newer RetroArch hotfix.
Why the separation matters
A lot of new users assume firmware and SD files are the same thing. They are not.
- Firmware updates the console’s system behavior.
- SD base package updates the card content, folders, RetroArch files, apps, and related assets.
- Hotfixes patch issues after the base SD package is already in place.
If you skip the SD package or hotfix, the device may still boot, but you may run into avoidable issues later.
Step 2: Install 7-Zip and Rufus
Before you handle the SD card, install these two tools on Windows:
7-Zip is needed because the firmware and SD packages are distributed as compressed .7z archives. Rufus is useful because large-capacity microSD cards often need to be reformatted cleanly to FAT32, which is a safer baseline for many retro handheld workflows than leaving the card in exFAT.
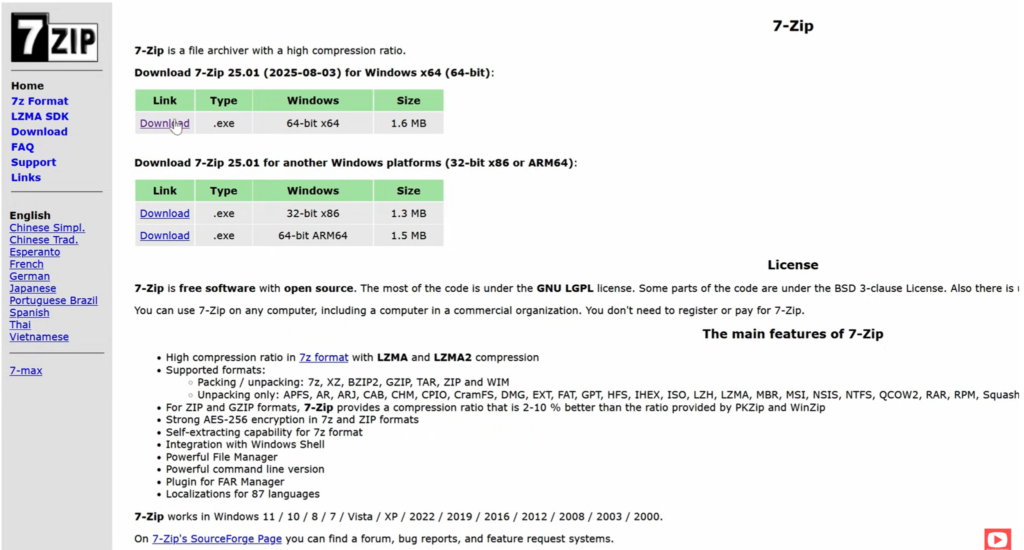
Caption: 7-Zip is needed to extract the firmware and SD package archives before copying them to the microSD card.
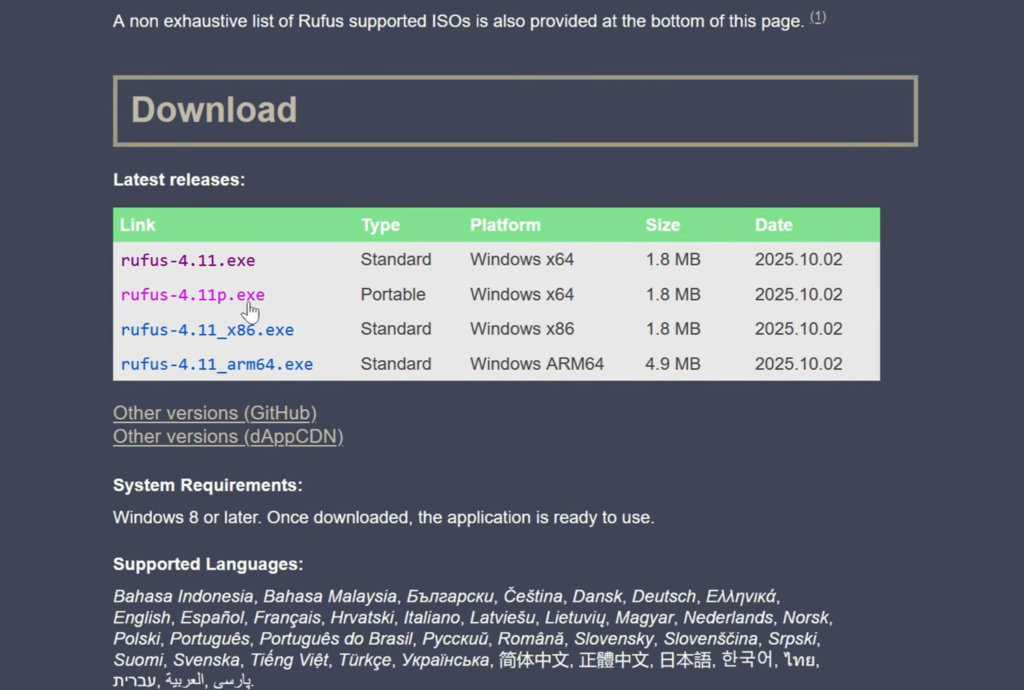
Caption: Download Rufus before formatting a large-capacity SD card for a clean Smart Pro S setup.
Security tip
Use the official 7-Zip site, not lookalike download pages. That is good practice for any setup tutorial involving archive tools.
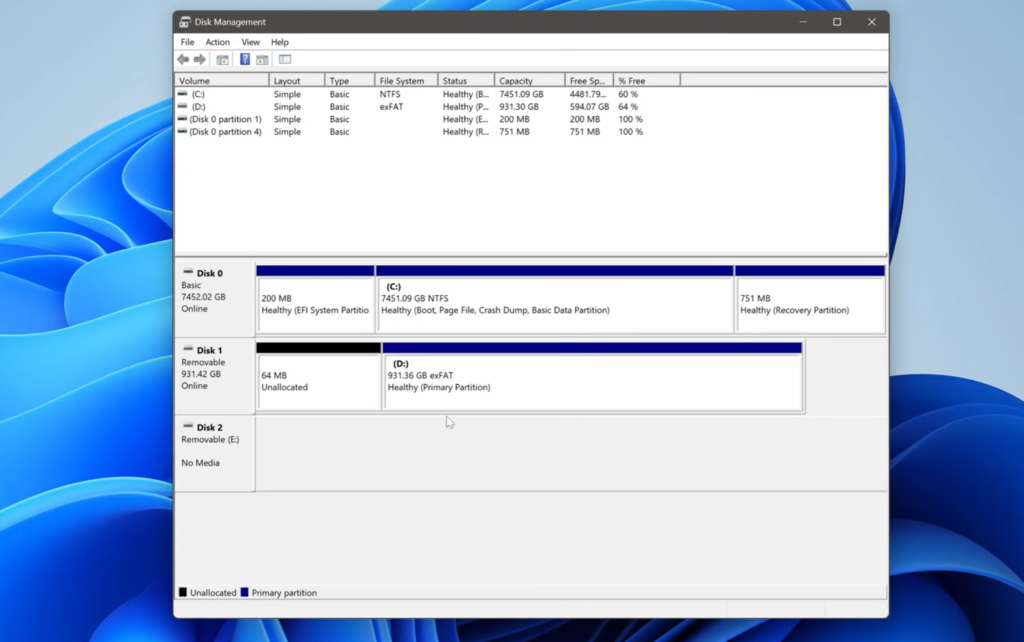
Step 3: Check the microSD Card in Windows
Insert the card into your PC and confirm that Windows is actually seeing it correctly before you format anything.
Caption: Check the removable drive in Windows Disk Management before formatting or rebuilding the Smart Pro S card.
Quick checklist
| Check | What you want to see |
|---|---|
| Card detected | Appears as a removable disk |
| Capacity looks correct | Roughly matches your real card size |
| Existing partition visible | Card is readable before reformatting |
| No corruption warnings | Windows should not show obvious file system errors |
If the card is acting strangely at this stage, solve that first. A broken or unstable card will waste time later.
Step 4: Format the microSD Card Correctly
Once the card is recognized, format it with Rufus.
Caption: Use Rufus to format the microSD card as Large FAT32 before copying the Smart Pro S files.
Recommended format settings
| Setting | Recommended value |
|---|---|
| Device | Your microSD card |
| File system | Large FAT32 |
| Cluster size | Default |
| Volume label | Something simple like TRIMUI |
Why FAT32?
For retro handheld setups, FAT32 is often a safer and more predictable baseline than leaving the card in exFAT, especially when you are dealing with RetroArch assets, save files, older script behavior, or SD package overlays.
If you are starting clean, format first and then build the card structure from scratch.
Step 5: Extract the Firmware and SD Archives
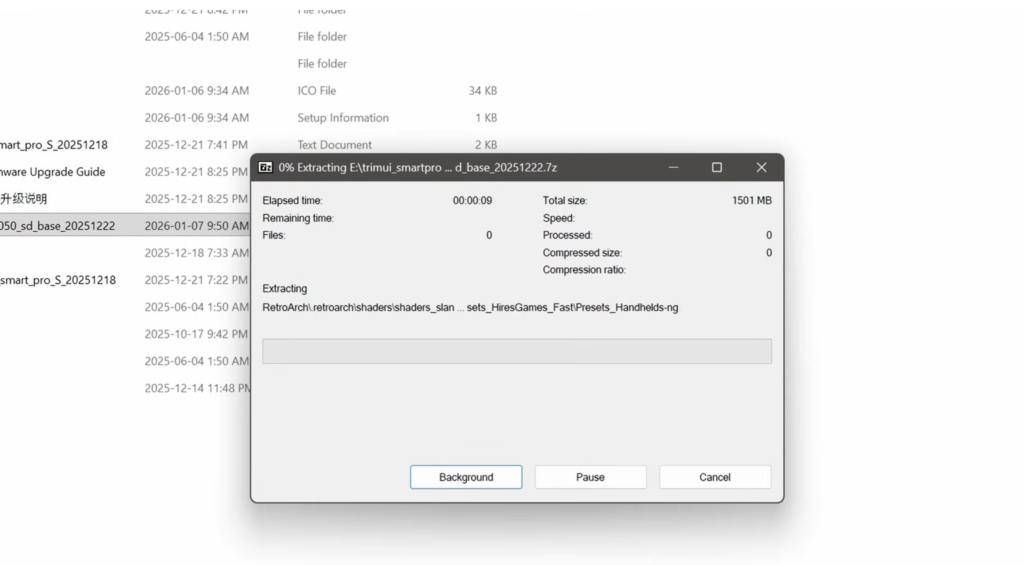
After downloading the files, use 7-Zip to extract them.
Caption: Extract the SD base package fully before copying any files to the microSD card.
What you should have after extraction
| Archive | What it becomes |
|---|---|
| Firmware package | Firmware image/files and release notes |
| SD base package | Folders and files for apps, emulators, RetroArch, ROM layout |
| Hotfix archive | Updated files that replace older package files |
Important
Do not just drag the .7z archives onto the SD card. The Smart Pro S needs the extracted files and folders, not the compressed archive itself.
Step 6: Copy the SD Base Package to the Card
This is one of the most important stages.
After extraction, copy the SD base package contents to the root of the microSD card.
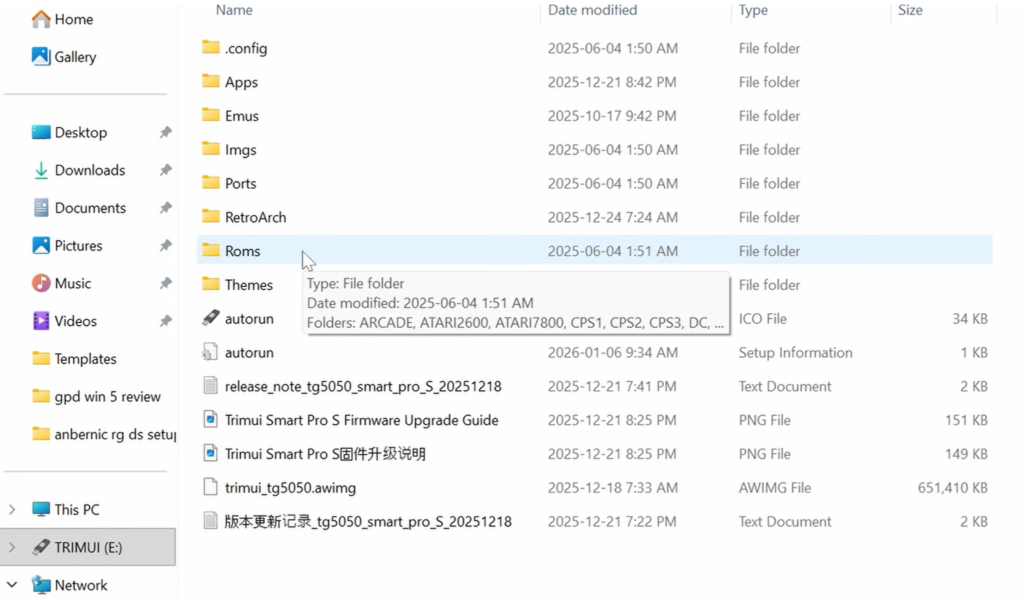
Your screenshot shows a correct root-level structure with folders such as:
.configAppsEmusImgsPortsRetroArchRomsThemes
Caption: A correctly prepared Smart Pro S microSD card should contain folders like Apps, Emus, Ports, RetroArch, Roms, and Themes.
Root folder reference
| Folder | Purpose |
|---|---|
| Apps | Optional apps and utilities |
| Emus | Emulator-related files |
| Imgs | Artwork and image assets |
| Ports | Ported games and related content |
| RetroArch | Core RetroArch files and configs |
| Roms | Your game folders |
| Themes | UI themes |
Best practice
Copy the extracted package contents directly into the card root.
Do not create an extra folder layer like sd_package/Apps o sd_package/Roms and leave everything nested inside it.
Step 7: Apply the Hotfix and Replace Older Files
After the SD base package is in place, apply the newest hotfix on top of it.
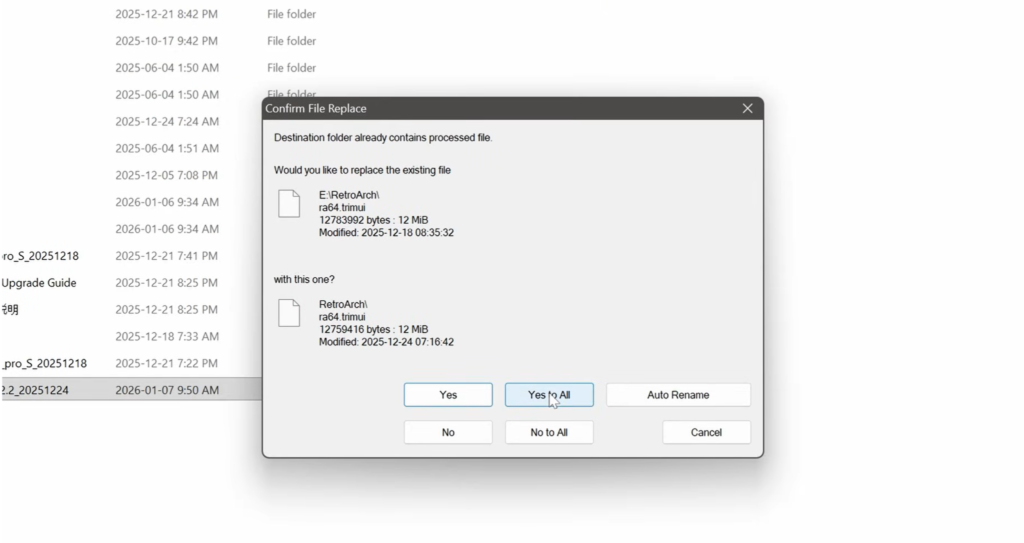
Caption: When applying the Smart Pro S hotfix, replace the existing files so the latest fixes actually take effect.
When Windows asks whether to replace the existing files, choose the option that replaces the older versions.
Why the hotfix matters
If you skip the hotfix, you may still run into:
- RetroArch crashes when exiting games
- save / memcard / battery savestate issues
- outdated files that make the overall setup less stable
From a practical setup perspective, the safest advice is simple:
Do not stop at the base package. Apply the hotfix too.
Step 8: Update the Firmware
Firmware and SD files are separate.
If you have downloaded the newest official firmware, follow the included upgrade guide and apply it before you start serious use.
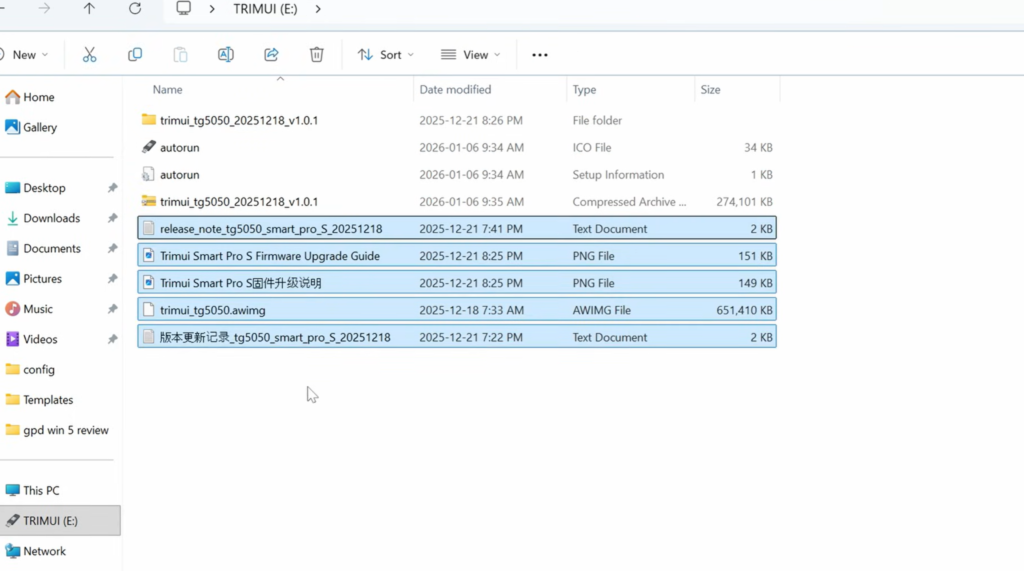
Caption: The official package includes firmware-related files, release notes, and a Smart Pro S upgrade guide image.
The firmware release notes matter because they often explain exactly which bugs were fixed. That makes troubleshooting easier later. If your device behaves strangely, one of the first questions should always be: am I actually on the current firmware?
Step 9: Understand the ROM Folder Structure
Once the SD card is prepared, open the Roms folder.
Your screenshots show the expected platform-based layout, including folders like:
ARCADEATARI2600ATARI7800CPS1CPS2CPS3DCFCGBGBAGBCMAMEN64NDSNEOGEO
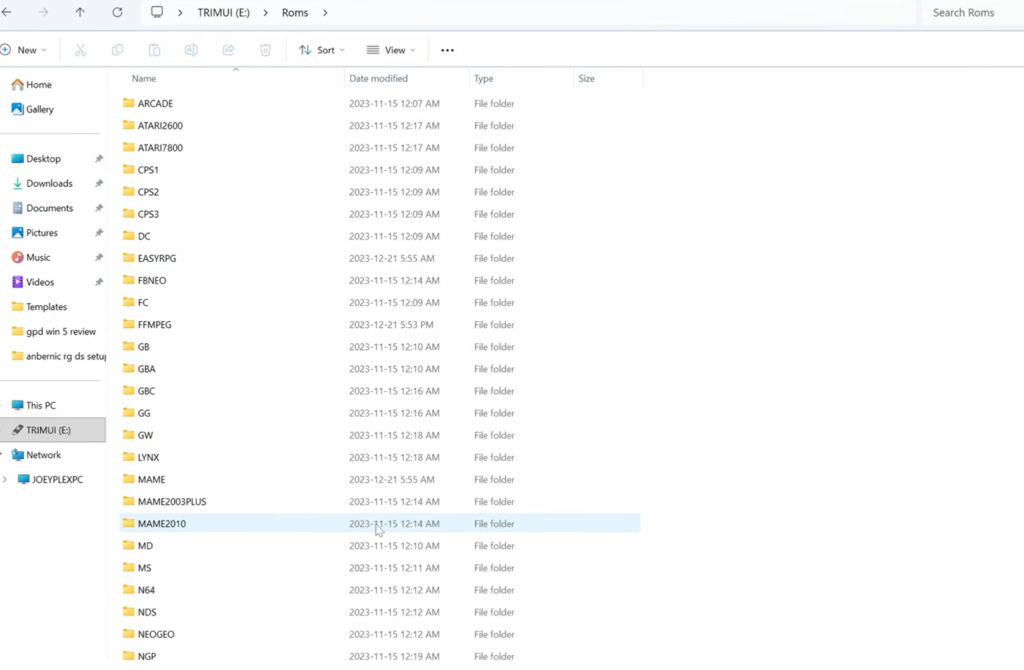
Caption: The Smart Pro S organizes ROMs by platform folder inside the main Roms directory.
ROM folder usage
| Folder example | Use it for |
|---|---|
GB | Game Boy |
GBA | Game Boy Advance |
GBC | Game Boy Color |
FC | NES / Famicom |
N64 | Nintendo 64 |
DC | Dreamcast |
CPS1 / CPS2 / CPS3 | Capcom arcade systems |
ARCADE / MAME | Arcade titles depending on the emulator/core |
Best practice
Copy games only into the correct platform folders.
Do not dump everything into one directory.
Step 10: Boot the Smart Pro S and Check the Interface
After the SD card is fully prepared, insert it into the device and boot the Smart Pro S.
Caption: A clean Smart Pro S boot screen confirms that the device is reading the interface and menu structure correctly.
Once ROMs are added, the Games tab should begin showing system categories.
Caption: After ROM folders are populated correctly, the Smart Pro S game categories should appear in the Games menu.
If your games do not show up
Check these first:
| Problem | Likely cause | Fix |
|---|---|---|
| No games showing | ROMs copied to wrong folder | Move files into the correct platform folder |
| Menu is empty | SD base package not copied correctly | Rebuild the SD card from scratch |
| Games missing | Files still compressed | Extract them first if required |
| Card reads but no systems appear | Wrong folder depth | Make sure folders are at the card root |
Step 11: Understand Save Problems Early
One of your screenshots shows a classic save-related error:
Caption: Save or backup memory errors usually point to an incomplete setup, missing hotfix, or outdated RetroArch files.
If you see “Save failed” or similar messages, check these first
| Problem | Likely cause | Fix |
|---|---|---|
| Save failed / checking backup memory | Missing hotfix or outdated RetroArch files | Apply the latest SD base package and hotfix |
| Savestates not behaving correctly | Old card contents still in place | Replace files with the newest package |
| Crash when exiting a game | Outdated SD package / missing hotfix | Install the latest hotfix |
| Random save behavior | Bad SD setup or corrupted card | Reformat and rebuild the card cleanly |
The correct troubleshooting mindset
If saves are failing, do not assume the emulator itself is broken first.
Start with:
- firmware version
- SD base package version
- hotfix status
- SD card health and format
That order saves time.
Common Setup Mistakes to Avoid
| Mistake | Why it causes problems |
|---|---|
Copying .7z files directly to the card | The device needs extracted files, not archives |
| Skipping the hotfix | Important RetroArch and save fixes never get installed |
| Using the wrong ROM folder | Games may not appear correctly in the UI |
| Leaving the SD card in a messy old state | Old files can conflict with new ones |
| Not replacing older files during copy | The update is incomplete |
| Using unofficial tool downloads | Security and reliability risk |
Preguntas frecuentes
Do I need to update firmware before adding ROMs?
Yes. That is the safest order. Update firmware first, then build the SD card with the latest SD base package and hotfix, then add ROMs.
Do I need the SD base package if my Smart Pro S already boots?
Usually yes. Booting is not the same as being fully updated. The SD package and hotfix help with RetroArch behavior, saves, and launch stability.
Why are my ROMs not showing up?
Most often because they are in the wrong folder, still compressed, or the SD base structure was not copied properly.
Why do saves fail?
Most save issues come from outdated SD files, a missing hotfix, or a messy card setup.
Should I reformat the SD card if things feel broken?
If the setup is inconsistent and you are not sure what was copied when, a clean FAT32 rebuild is often faster than random troubleshooting.
Final Thoughts
A clean TrimUI Smart Pro S setup is not difficult, but it works best when you follow the process in the right order:
- prepare the SD card
- format it cleanly
- download the latest official firmware
- download the latest SD base package
- apply the latest hotfix
- copy ROMs into the correct folders
- boot the device and verify saves, exits, and game detection
That order is more reliable than mixing old files, skipping updates, or troubleshooting save problems after the fact.
For a site like trimuibrick.com, this kind of guide does more than explain the hardware. It helps users actually succeed with it.